Your First Transaction (Web)
This guide assumes you're brand new to BeeCount — whether or not you've used the mobile app, you can follow along on the web version alone. Not signed in yet? See Overview first.
Opening the recording dialog
There's no standalone "+" button on web — everything goes through the command palette in the top right:
- Press
⌘K(macOS) /Ctrl+K(Windows / Linux), or click the search box in the top right - The first item under "Quick actions" is New transaction — press Enter (or click it) to open the recording dialog. Once you're used to it, pressing
Nwhile the palette is open triggers the same action
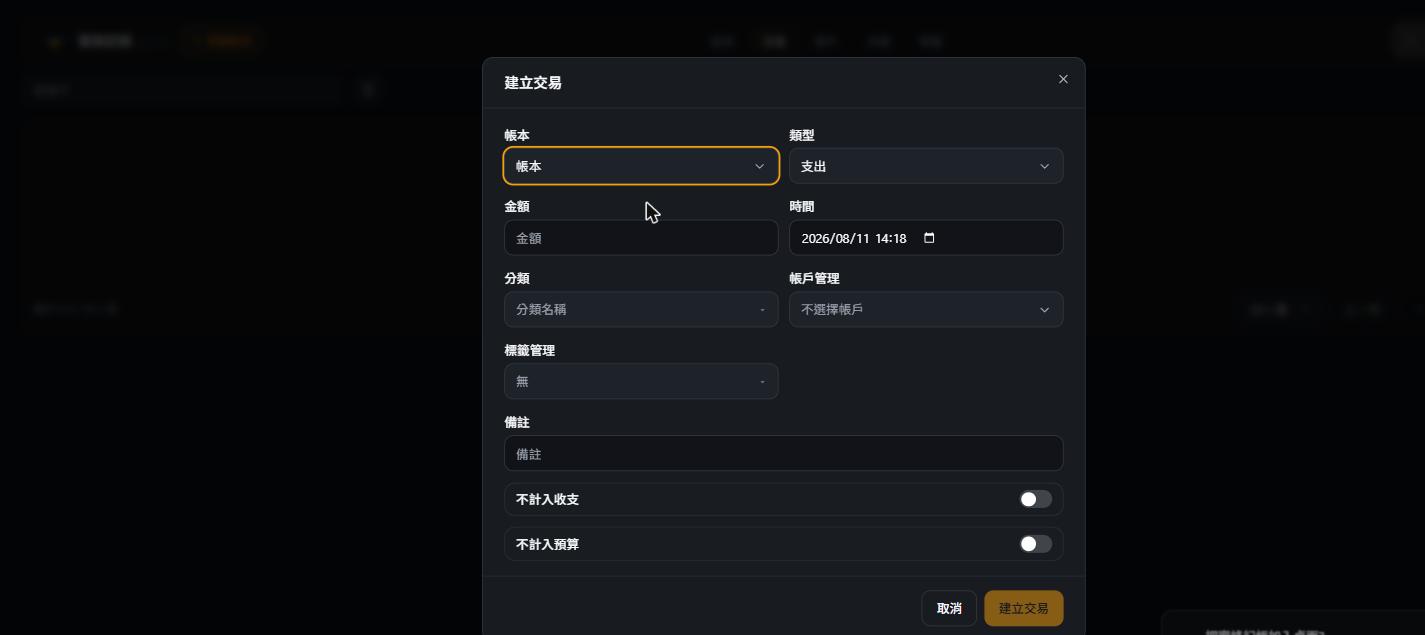
What each field means
The dialog opens as a blank form. Here's what each field does:
| Field | What it means |
|---|---|
| Ledger | Which ledger this transaction belongs to — defaults to your current one; switch here if you have multiple (e.g. personal + a shared family ledger) |
| Type | Expense (money spent) / Income (money earned) / Transfer (money moving between your own accounts, doesn't change your net worth — e.g. moving cash into a bank account) |
| Amount | Type the number directly |
| Time | Defaults to now — change it to a past date/time to backdate a transaction you forgot to log |
| Category | What the money was spent on (food, transport, shopping…), used for statistics later; not needed when type is "Transfer" |
| Account | Where the money physically sits (cash, debit card, credit card…). Category answers "what kind of spending"; account answers "which pocket the money came from" — the two are not the same thing |
| Tags | Optional — attach one or more custom tags for filtering later (e.g. "reimbursable", "trip") |
| Note | Optional — a short description, like the merchant name |
| Exclude from totals | When on, this transaction won't count toward this month's income/expense stats — useful for money you lent out and got back, which isn't real spending |
| Exclude from budget | When on, this transaction won't deduct from that category's budget |
If your category or account list is empty (common right after signing up), go set a few up first at Category Management and Account Management — these settings are shared between the app and web, so you only need to set them up once.
A worked example
Say you just bought a $12 lunch: pick "Expense" as the type, enter 12 for the amount, write "lunch" as the note, pick the "Food" category, and choose the card or cash account you paid with.
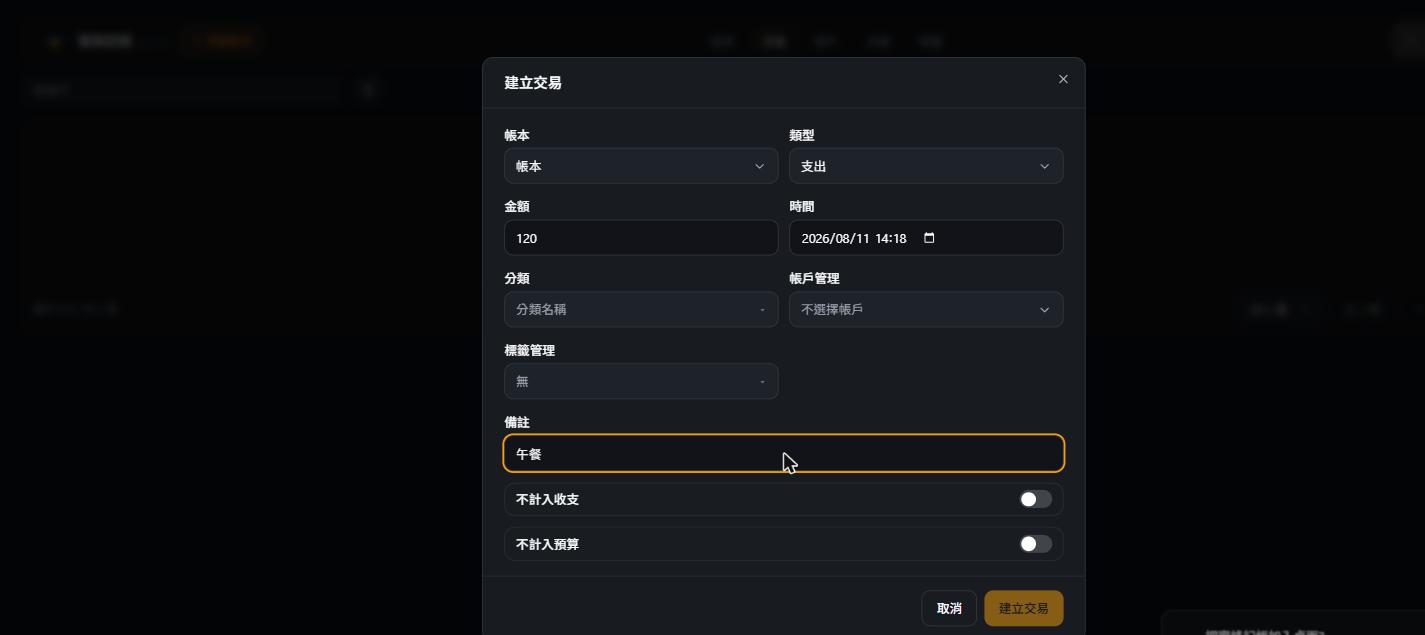
Once everything looks right, click "Create transaction" in the bottom right. The dialog closes and the transaction immediately shows up in the transaction list.
Recording tips
- Bulk-export for month-end reconciliation: command palette → type "export" → pick "Export this month CSV" — much faster than checking entries one by one
- Forgot to log something? Backdate it instead of skipping it: open the recording dialog and change "Time" to when it actually happened — it works the same as logging it that day
- Recurring income/expenses don't need to be logged by hand every time: for rent, subscriptions, and other fixed monthly items, set up a rule once under Cloud Advanced Features → Recurring Transactions and let the system generate them automatically (this section of the sidebar is currently Chinese-only)
- You can paste an image straight into the page on desktop: snap a photo of a receipt, then
⌘V-paste it into the page and let AI recognize it — see AI Image Recognition
Next steps
- Categories & Tags — build out your own category structure
- Accounts & Ledgers — manage multiple accounts and set budgets
- Command Palette & Shortcuts — the full list of web-only keyboard shortcuts
- Cloud Advanced Features (sidebar, Chinese-only for now) — recurring transactions, installments, split refunds, and other advanced recording scenarios