Basic Recording
BeeCount supports three transaction types: Expense, Income, and Transfer.
Quick Recording
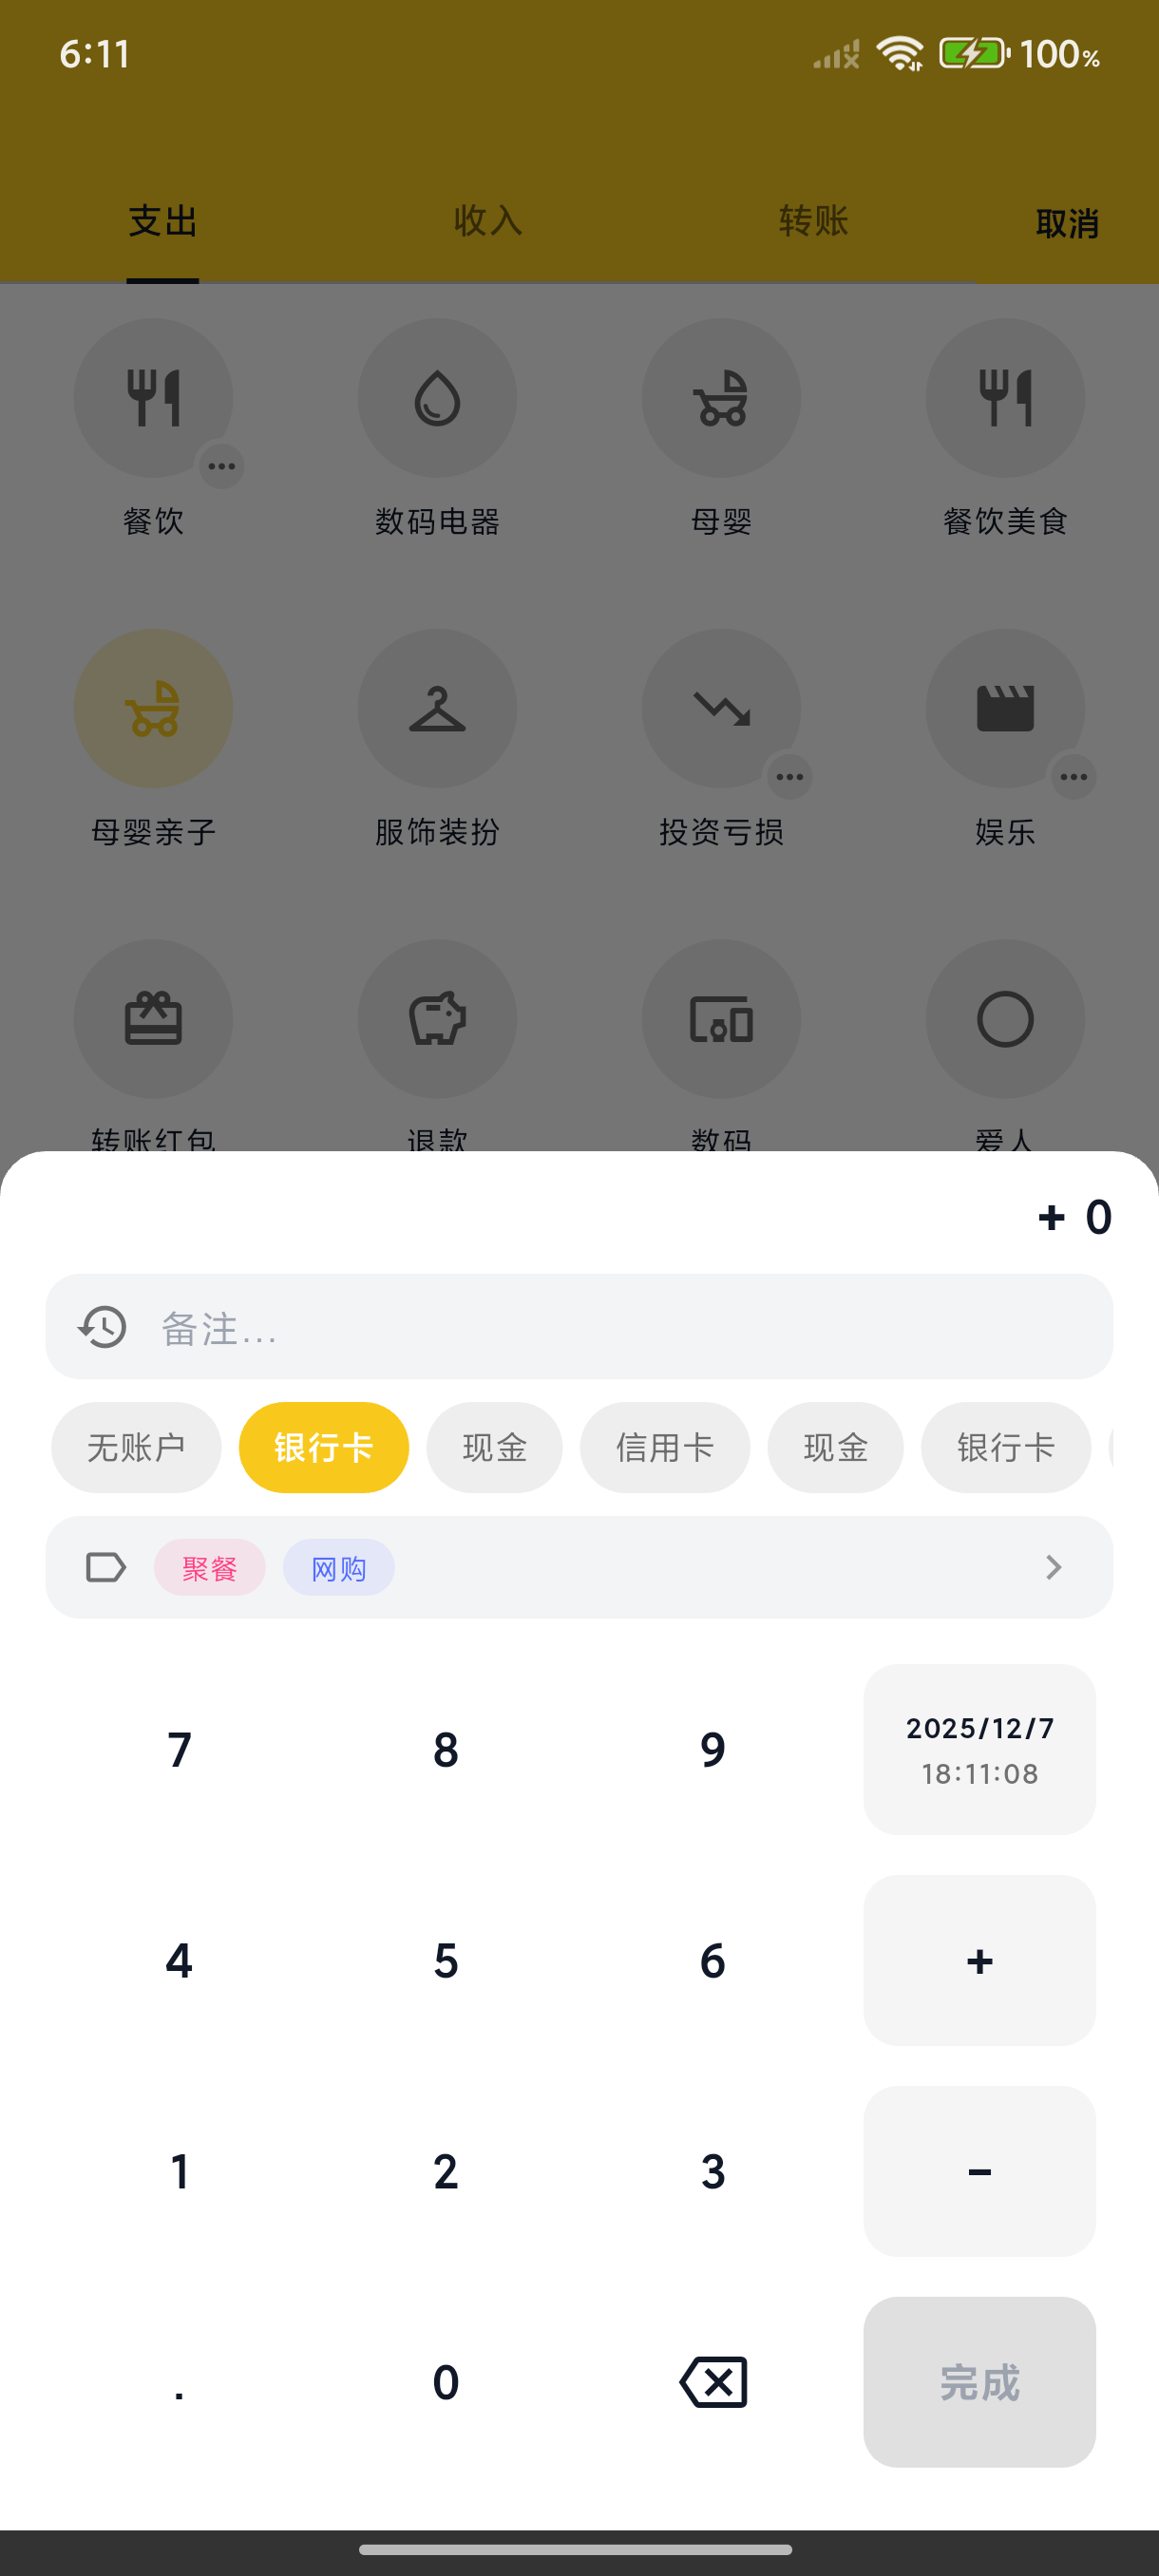
Tap the "+" button at the bottom center to open the recording page.
Steps
- Select Type - Expense / Income / Transfer
- Enter Amount - Use the number pad
- Select Category - Tap a category icon
- Select Account - Choose the associated account
- Save - Tap the save button in the top right
✨ Since v3.3.0: the amount keypad supports + − × ÷ — long-press or double-tap to switch, handy for splitting bills or merging receipts right on the keypad.
Optional Information
- Note - Add a transaction description
- Tags - Add one or more tags
- Date & Time - Change the recording time (for backdating)
- Image - Add a receipt or proof
Edit & Delete
- Tap a transaction to edit it
- Swipe left on a transaction to delete it
Transfer Records
Transfers move funds between different accounts:
- Select "Transfer" type
- Choose source and destination accounts
- Enter transfer amount
The system automatically updates both account balances.
Web Recording
After logging in to BeeCount Cloud on the web, desktop entry is faster. There's no standalone "+" button on web — everything goes through the command palette:
- ⌘K / Ctrl+K command palette — works on any page; the first item, "New transaction", opens the recording dialog on Enter (shortcut
N) - Bulk operations — list view supports multi-select delete / export CSV (see Transactions)
- Desktop keyboard flow — number pad, Tab to switch fields, Enter to save
The dialog has the same fields as mobile: ledger, type (expense/income/transfer), amount, time, category, account, tags, note, plus two extra toggles ("exclude from totals", "exclude from budget"). For a full walkthrough with screenshots, see Web: Your First Transaction.
Transactions created on web sync to mobile within seconds via cloud, and vice versa.